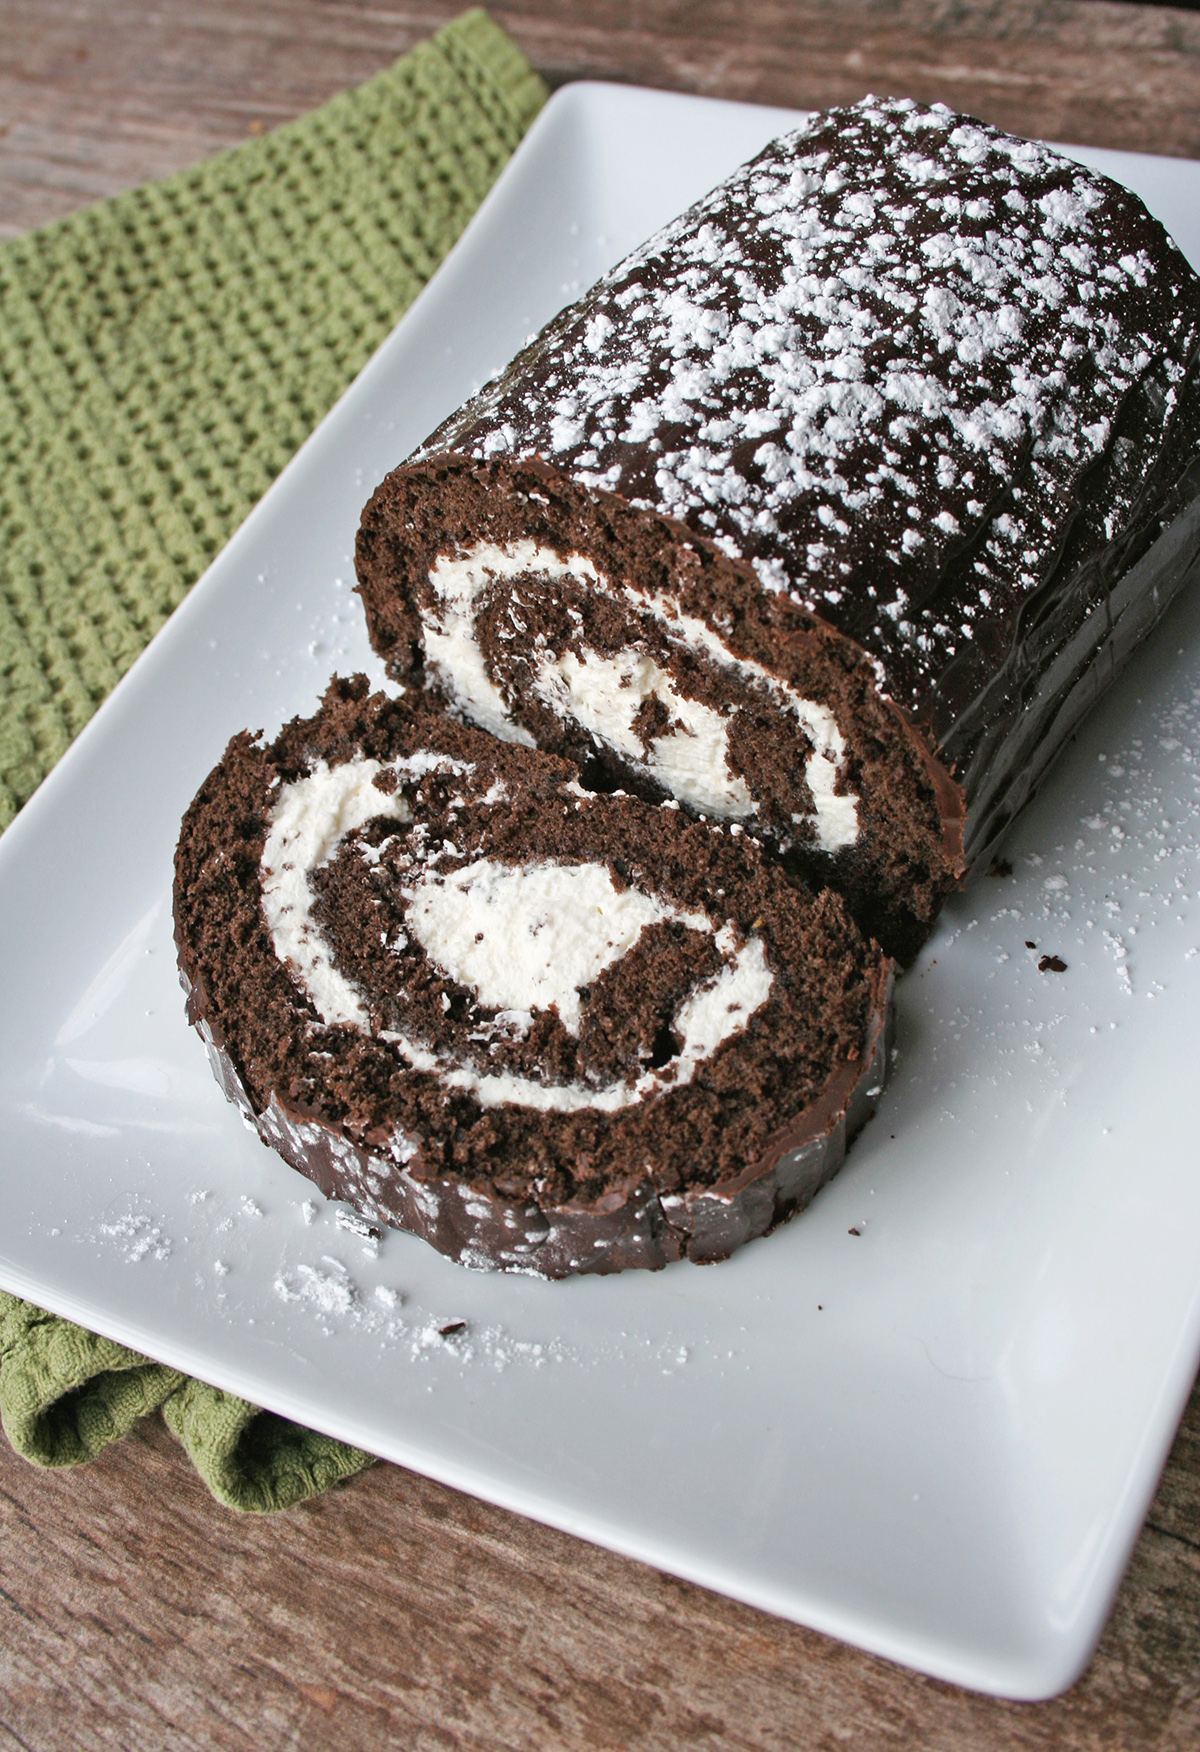
Looking for an elegant way to finish off your holiday dinner? Make a homemade Bûche de Noël for dessert. “Bûche de Noël” translates as “Christmas log”; also known as a yule log or a chocolate roulade cake, it composed of a rolled chocolate cake with whipped cream or buttercream, and is traditionally decorated to look like, well, the cake version of a log.
Preheat your oven to 375 degrees F. Prepare a jelly roll pan by generously greasing the bottom and shallow sides. Then, line it with parchment paper, and grease the top of the parchment paper. Sprinkle the greased parchment paper with sifted cocoa powder (see note). Don’t skimp on the greasing; you want to make this cake as easy as possible to cleanly remove from the pan.
In a medium bowl, sift together the flour, cocoa powder and salt. Set to the side.
In large bowl, whisk together the egg yolks and ½ cup of the sugar vigorously, until the mixture is thick and has lightened to a lemony color. Add in the Colavita Extra Virgin Olive Oil and vanilla, whisking until incorporated.
In a separate bowl, using an electric or hand mixer, whisk the egg whites on medium-high speed until soft peaks form. Reduce speed to low, and add the remaining ½ cup of sugar in a slow but steady stream. Return the speed to medium-high and beat until stiff peaks form.
Gently fold the egg white mixture into the yolk mixture. Add the flour mixture a little at a time, gently folding until everything is all blended.
Pour into pan, spreading the batter to the corners (but taking care not to upset the parchment paper lining the bottom).
Bake for 15 to 18 minutes, or until the cake springs back from a gentle nudge in the center. You don’t want toasty edges on this cake, as it makes it more difficult to roll.
While the cake is baking, spread out an impeccably clean kitchen towel on a counter space and sprinkle it with cocoa powder.
When the cake comes out of the oven, immediately run a sharp knife along the edges of the pan to loosen the cake. You may even use a spatula inserted down the side of the pan to loosen the bits from the edges of the bottom of the pan, too.
Take a deep breath, and then quickly flip the pan on top of the cocoa-powder-topped towel. Just do it — no hesitation. With care, gently peel off the parchment paper. If you have crispy edges on the cake, go ahead and trim them off--they won’t roll well.
Now, while the cake is still warm, gently roll it up using the towel, so that the cake doesn’t stick to itself but is rather rolled up with the towel where filling would be. What you are doing here is stretching the cake while it is still quite springy. It won’t roll as well if you wait until it cools. Tuck the towel under the bottom of the roll; it should stay in place. Let it cool, rolled up, for about 30 minutes.
While the cake cools, prepare your whipped cream filling. The the chilled bowl of a stand mixer fitted with the whisk attachment, whisk the heavy whipping cream until soft peaks form. Add the sugar and vanilla extract, and continue whipping until firm peaks form. Store in the refrigerator until you’re ready to assemble the cake.
Once the cake has come to room temperature, it’s time to fill it with the whipped cream. gently unroll the cake from the kitchen towel; it will partially hold its shape, but will unroll flat enough to spread the filling. Spread the whipped cream across the top of the cake, leaving about 1 inch bare on the right hand side of the cake.
With the long side of the cake facing you, start from the left and gently roll the cake. As you roll, the whipped cream filling will spread slightly, so that gap you left at the right hand side should be filled by the time you roll the edge of the cake. Once rolled, cover the entire roll tightly in plastic wrap and place in the freezer while you prepare the topping. A firm, slightly chilled cake will be easier to ice.
It’s time to make the ganache topping. Melt the chocolate. You can do this over the stovetop, in a double boiler. Or, you can place it in a heatproof bowl and microwave it in 20-second blasts until mostly melted; once you give it a stir, the remaining unmelted portions should settle into smooth, melted bliss. Add the olive oil, and whisk until the mixture is cohesive. You’ll notice that the chocolate is probably still quite liquid at this point. Let it cool at room temperature, whisking occasionally to discourage separation, until it seems thick enough that you could spread it on top of your cake (30 minutes at minimum, though this could depend on the heat and humidity where you are).
Now, it’s time to assemble and finish the cake. Take the cake out of the freezer. If you’d like to have a “stump” on your cake, slice off an inch-thick slice on a slight diagonal from one of the ends of the cake. Using a small spoonful of the ganache as “glue,” adhere this to the top of the roll cake.
Using the rest of the ganache, ice the cake on the sides (and if desired, on the ends, or you can keep them un-iced) and all over the stump. Gently drag the tines of a fork or the edge of a butter knife along the surface of the ganache to give it a “woody” appearance. If desired, finish with a sprinkling of confectioners’ sugar on top.
Slice into “coins” to serve. Store leftovers, well wrapped, in the refrigerator.
Servings 8